
Toilets
Installing a toilet yourself: checks, steps and limitations
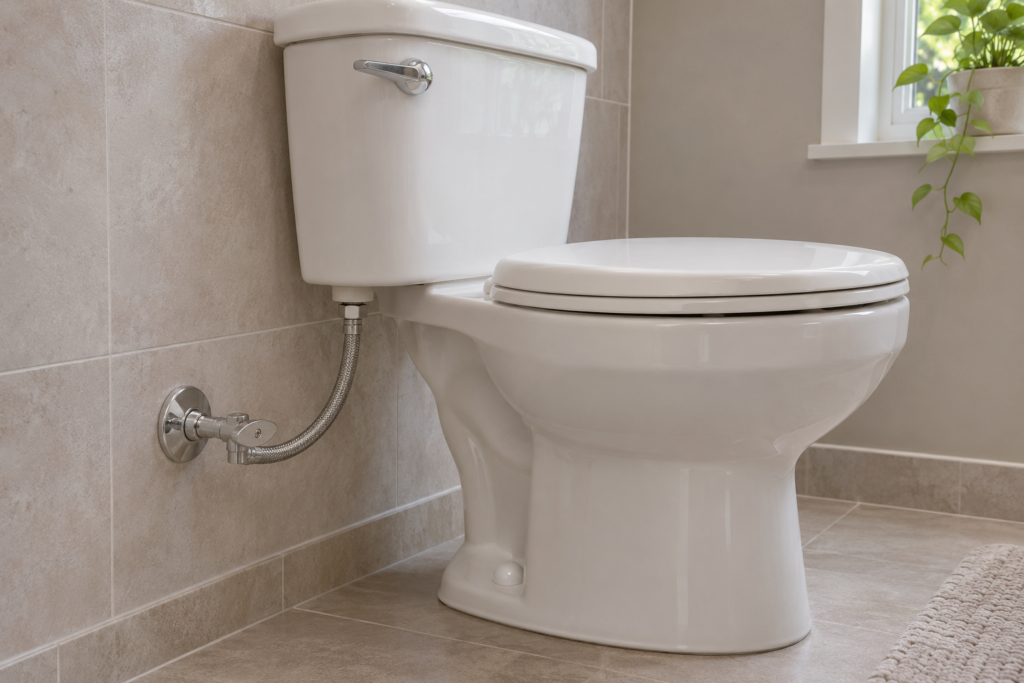
Can you install a toilet yourself in Quebec? A replacement in the same location may be possible once you have checked permission, fixture compatibility and the condition of the existing connections. The decision involves more than being comfortable with tools. A damaged flange, unstable floor, shutoff that will not close or required piping change can alter the project.
This guide helps you prepare that decision and understand the stages of replacement. Keep the instructions for the exact toilet, outlet seal and supply connector available throughout the work. Before taking anything apart, plan for an interruption that leaves the drain opening needing protection and the household needing another toilet. A replacement is easier to manage when you decide your stopping points in advance.
Installing a toilet yourself: check permission first
Property ownership does not create identical DIY permissions for a family home, rental building and condominium. The CMMTQ explains conditions for doing your own work, in French. Confirm which conditions apply to your building. Check municipal requirements and obtain any needed landlord or condominium authorization before planning the shutdown.
Those permissions are separate from an RBQ declaration of work. The August 2024 declaration guide, in French identifies sanitary-fixture replacement without adding or removing piping as work that does not require that declaration. This is not a blanket municipal permit exemption or permission to relocate the drain.
Describe the proposed work accurately when asking for confirmation: replacement in the same spot, floor-mounted fixture, retained or modified connections, building use and any planned flooring work. An answer about an owner-occupied single-family home should not become general permission for work in a rented apartment. Keep the response and any conditions with your project records so that you can refer to the actual advice received.
If the scope changes after removal, check the requirements again before continuing. When choosing help, read about checking a plumber’s qualifications and warranties. Ask who will assess unexpected defects and how additional work will be authorized. You should understand what belongs to the original replacement and what would change the agreement. Avoid making decisions about licensing or permits from a generic installation video.
Choose a toilet that fits the actual bathroom
Get the installation instructions for the exact model before buying it. Compare the rough-in drawing with the existing location: drain position relative to the finished wall, tank and bowl footprint, access to fasteners and water-supply position. A common dimension advertised in a store does not establish that a particular fixture will fit your bathroom.
Look at the space around the fixture as well as underneath it. The door must work, occupants need room to move and the supply shutoff needs to remain usable. A longer bowl or differently shaped tank can interfere with a cabinet that caused no difficulty before. Product dimensions do not replace applicable clearance requirements. Have an uncertain layout checked before placing an order.
Find out which parts are included and which must be purchased separately. Outlet seals, mounting hardware, tank-to-bowl components and supply connectors perform different jobs. A bolt washer does not replace the seal between the bowl and drainage connection. A wall-hung toilet, macerating system or electrically powered fixture introduces a different scope from a straightforward floor-mounted replacement.
Consider the people using the bathroom: seat height, bowl shape, cleaning access and the ease of operating the flush. A choice based only on appearance may miss an important mobility need. If the room must meet specific accessibility requirements, discuss the complete arrangement with someone qualified to assess them. A suitable fixture cannot compensate for every constraint in the surrounding room.
Before removing the old toilet, open the packaging and check that the delivered parts match the order. Look for visible shipping damage without installing a questionable component. Keep model labels and packaging until checks are complete. Discovering a missing part while the old toilet remains usable is easier to manage than finding it after the drain has been exposed.
Prepare the work area and an alternative toilet
Allow for an unexpected interruption. If this is the only toilet in the home, arrange an alternative during the shutdown. Avoid dismantling immediately before a period when you cannot obtain suitable parts or an assessment. This does not predict how long replacement will take; it reduces the pressure to continue despite a defect you had not planned for.
Clear the route between the bathroom and the place where the old fixture will be set down. Protect surfaces against impacts and residual water. Plan handling around the weight and shape of the appliance and arrange the help needed to control it. Do not lift a difficult bowl alone or break porcelain to make removal easier. Sharp fragments create an additional problem.
Gather the model manual, seal instructions, connector information and manufacturer support details. Read the full sequence before beginning. Identify stages that require lifting, stabilization or access behind the bowl. Instructions for a similar-looking model may describe different mounting hardware. If the correct document cannot be obtained, resolve that gap before opening the water or drainage connections.
Arrange disposal according to local collection rules. Do not assume a toilet can be left at the curb whenever the work is finished. Check with the municipality or ecocentre for the actual options. Waste collection arrangements and plumbing-work permission are separate questions. Preparing one does not settle the other, but both affect whether the project can proceed smoothly.
Isolate the water before the removal stage
Before disconnecting anything, you must be able to isolate the supply and manage residual water. If the shutoff will not close, leaks or involves a shared supply, stop and arrange the appropriate shutdown. Do not force a seized valve to stay on schedule. In a multi-unit building, isolation may affect other occupants and need coordination with the person responsible for the property.
Closing the supply does not remove water already in the appliance. Prepare to collect it according to the instructions and protect nearby surfaces. Keep children and pets away from the work area. If water could reach an outlet or electrical equipment, avoid touching wet equipment and have the situation made safe. Do not let an apparently small bathroom project distract you from the surrounding hazards.
Follow the manufacturer’s removal sequence. A corroded or inaccessible fastener is not a reason to apply uncontrolled force to porcelain or piping. If removing it requires a method beyond your preparation, pause. Having the obstruction assessed can preserve a connection that is still usable. Breaking another component may change both the work required and the time without a toilet.
During the interruption, the drain opening needs suitable protection against debris and sewer gases without letting anything fall into the pipe. Do not leave an exposed opening unattended. If you cannot safely manage this stage, arrange plumbing help before dismantling. Strong odours accompanied by symptoms of illness require leaving the area and obtaining appropriate assistance rather than continuing to investigate at the opening.
Let the flange and floor determine the next step
Once the area is accessible, a cracked, loose or deteriorated flange, unusable fasteners or visibly damaged floor calls for assessment before fitting the replacement. Added flooring can change the relationship between flange, seal and bowl. Visual observations help identify concerns, but they do not certify the strength of an assembly hidden beneath the floor.
Do not solve uncertain height by stacking seals at random. Do not pull an unstable bowl against the floor by tightening mounting bolts further. The selected seal and any correction need to suit the real assembly. For a support defect, uncertain connection or work beyond your preparation, arrange an assessment for toilet repair or installation.
Pay particular attention to existing moisture. Photograph the accessible area and note what was wet before cleaning. Swollen or soft flooring is not corrected merely by placing a new fixture over it. The moisture source and the condition of the support need to be understood before the area is covered. Corrective work may involve more than the plumbing connection itself.
Tell the professional if tile or another floor covering was added. Provide the new toilet model and details of the proposed seal. This helps frame the compatibility discussion without demanding a diagnosis from a photograph alone. Do not order a repair component simply because it resembles something shown in an online demonstration. Similar appearances can hide different connection requirements.
Coordinate the toilet, seal and supply instructions
The toilet manual establishes assembly order and mounting details. Seal instructions describe suitable installation conditions, while supply-connector information identifies permitted connections and tightening. These documents need to work together. There is no universal number of wrench turns that applies to every bolt or nut. Resolve uncertainty about the actual parts before applying force.
For example, Kohler manual 1087557-2-E contains requirements for a particular model. Use your own appliance documentation to establish how to position the bowl, protect the seal and complete assembly. Instructions transferred from a different model may require clarification from the manufacturer or a professional familiar with the actual installation.
Distinguish drainage components from the parts supplying water to the tank. An outlet seal cannot correct a leaking supply hose. Likewise, a new supply connector does not correct a moving flange. If two sets of instructions appear incompatible, stop and request clarification using the exact product references. Describing the connection accurately is more useful than asking whether every toilet uses the same procedure.
Think about maintenance access once the appliance is installed. Fasteners should remain accessible as designed, the shutoff must be usable and the connector must follow its installation conditions. Do not compensate for a short or badly positioned connector by pulling on the water line. Select a connector appropriate to the real arrangement and clarify any uncertainty before fitting it.
Take particular care with porcelain during tightening. More force does not necessarily create a better seal. Follow the specified method and do not try to eliminate movement from poor support by tightening the bolts harder. If a component appears cracked during assembly, do not continue testing to see whether it will hold. Resolve the condition before putting the fixture into use.
Check the installation before returning it to service
After assembly to the applicable instructions, check the supply, connectors, tank joints and base during filling and the manufacturer’s prescribed tests. The bowl needs to be stable. If there is leakage, movement or abnormal filling, stop using the fixture and have the cause located. Do not assume that a new appliance makes an old connection problem disappear.
Start observations with dry surfaces so that newly appearing water can be identified. Note when it appears: opening the supply, filling, flushing or standing unused. Record that timing without repeatedly dismantling different components. A clear description and photographs can help prepare an assessment, even though they cannot replace examination of the installation.
Water on the floor does not identify the failed component by itself. Read about water leaking around a toilet base. An unsatisfactory flush calls for telling a flush mechanism fault from a blockage, rather than repeating tests when water rises. Silicone or additional tightening should not be used to hide an unexplained symptom.
After the toilet returns to service, maintain access to the connections and watch for new moisture, odour or movement. A successful first flush does not establish that every installation condition is satisfied. If a defect becomes apparent, limit use and have the source checked before it develops into concealed damage. Follow the manufacturer’s inspection and care guidance for the actual model.
Describe the job clearly when requesting help
Provide the model number, fixture location, building type and a description of what has already been removed. Explain whether the water is isolated, whether there is an active leak and whether another toilet is available. Avoid presenting a diagnosis as certain when the only observation is water on the floor or movement at the bowl.
Ask what the proposed work includes: removal, installation, supplies, connection checks, testing and disposal of the old appliance. Clarify how unexpected flange or floor damage would be handled. The fixture’s purchase price alone cannot establish a universal installation cost. Access, condition and necessary corrections change the scope, so ask for a description you can compare with the actual situation.
Keep the detailed invoice, manuals, part references and the warranty conditions actually provided. Record when the work was done and what was observed during checks. These documents can support maintenance or a follow-up request. They do not, by themselves, guarantee coverage from a manufacturer or insurer. If coverage matters to a decision, verify the relevant terms directly.
Three situations that call for different decisions
First, suppose the existing toilet works and you simply want a different model. Measurements, manual comparisons and permission checks can happen while the old appliance remains available. That preparation leaves time to correct an unsuitable order. It also helps distinguish an appearance preference from an accessibility need or a repair that should be diagnosed first.
Second, suppose a recently installed toilet develops water around it. Do not immediately decide that the entire appliance must be replaced. Note the circumstances, isolate the supply if safe and contact the person responsible for installation. Preserve information about the parts used and avoid changing several assemblies before the source of the water has been assessed.
Third, suppose removal exposes deteriorated support. The project no longer matches the straightforward replacement that was prepared. Protect the area and clarify the necessary corrections, responsibilities and conditions for returning to service. The new toilet can remain uninstalled during assessment. Fitting it quickly just to regain a usable appliance can conceal the original concern.
In each case, the next step should follow the actual observations. Preparing an installation does not commit you to finishing despite changed conditions. An organized pause with water controlled and the drain protected is a useful decision when the assumptions behind the original plan no longer hold. Explain those changed conditions when asking for assistance so the visit can be prepared appropriately.
Frequently asked questions about toilet replacement
Can parts from the old toilet be reused?
Do not assume a component suits the replacement because it is still attached to the old appliance. Check condition, compatibility and the relevant instructions. Reuse rules for seals and connectors depend on their design and manufacturer. A small saving should not become a reason to retain an assembly whose suitability has not been established.
Does a moving toilet need to be replaced?
Movement alone does not prove that the bowl needs replacement. It may indicate a fastening, support or connection problem. Stop stressing the appliance and have the assembly assessed. Buying a new fixture before understanding the defect can leave the same difficulty beneath the replacement.
Will silicone around the base stop a leak?
A finishing product does not replace a sound drainage seal or water-supply connection. Follow the applicable requirements and appliance instructions for finishing. If water appears, identify its source before adding a product that could simply conceal the symptom and delay recognition of the underlying problem.
Can the toilet move slightly during replacement?
Relocation can affect connections, clearances and required authorizations. Treat it as a change in scope that needs verification before ordering or modifying existing piping. A small change on a floor plan does not demonstrate that the plumbing beneath the floor can accommodate it without additional work.
Explore the other guides in the Toilets category according to the symptom or decision you are facing. The aim is an appropriate intervention, a verifiable installation and useful records for future maintenance.