
Leaks, faucets and fixtures
Dripping bathtub faucet: identify the leak and the correct repair
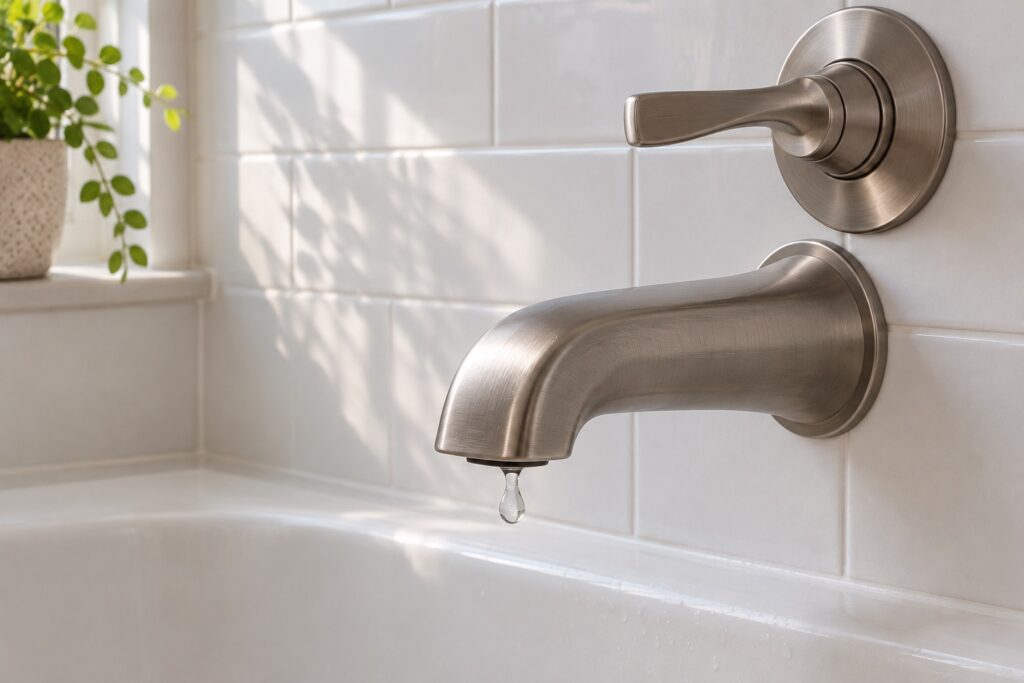
A dripping bathtub faucet does not automatically need a new spout. If water keeps falling from the spout long after you turn the control off, the shutoff mechanism is a likely place to investigate, but the correct part depends on the make and exact model. Water emerging at the handle, behind the trim plate, at the base of the spout, or in a neighbouring room points to a different problem. Locate the water and identify the valve before buying a cartridge.
This guide uses seven decision steps. Many are observations you can make without opening the plumbing. A repair makes sense only when the part, manufacturer’s instructions, and safe access are clear. If water is entering a wall, floor, ceiling, or another unit, deal with the water supply promptly. Stay away from wet electrical equipment. If you cannot isolate the fixture safely, ask the building’s authorized contact or a plumber to do it.
Dripping bathtub faucet: where is the water appearing?
- Continual drops at the spout while the control is off: investigate the valve’s shutoff components for that model. The spout may only be where the water becomes visible.
- Moisture around the handle or wall plate: the leak may be at the control or behind the trim. Protect the surrounding wall and have spreading moisture assessed promptly.
- Water at the spout’s wall connection while the tap runs: this is different from a valve that fails to shut off. Do not twist an unidentified spout loose.
- The shower runs while you fill the tub: the spout diverter or installation may be involved. A replacement cartridge is not a universal answer.
- A few drops after a shower ends: watch whether they taper off. Water retained in the shower piping can drain; a continuing flow after a suitable wait needs attention.
Record the location, timing, and duration. Those details are more useful than calling every symptom a “leak.” If the tub drains slowly instead of dripping from the spout, see the checks for a slow-draining bathtub. If the damp patch seems unrelated to the bathtub control, our guide to looking for signs of a hidden leak may help you describe what you see.
Step 1 — Make the area safe and limit damage
With a dripping bathtub faucet, first determine whether the water stays inside the tub or reaches the caulk line, wall, floor, adjacent room, or a unit below. If it is spreading, shut off a known, working valve that supplies the fixture. In an apartment or condominium, a valve may affect other fixtures or households. Coordinate with the property manager before shutting off a shared supply. The Québec building regulator, RBQ, explains that an installation must be isolatable before work and that shutting water in a multi-unit building affects other residents.
If you cannot identify a safe shutoff, do not remove the handle to explore. The piping may still be pressurized, and moving a retaining part can turn a small drip into a larger escape of water. Tell the owner or building contact when the property is not yours. Use a towel or container only if it does not delay isolating the water. Photograph water marks and note whether they are spreading. Water close to electrical fixtures, seeping through a ceiling, or collecting behind a wall calls for urgent help.
Hot water adds a separate risk. The Public Health Agency of Canada recommends mixing protection at baths and showers to reduce scalding. After work on a tub control, check the temperature cautiously before anyone uses it, especially a child. Do not adjust a temperature stop or mixing valve at random to compensate for a changed handle position.
Step 2 — Distinguish residual water from a continuing drip
Turn the tap off normally without forcing the handle. Dry the spout, the underside of the handle, and the wall plate. Put a dry container beneath the spout and leave the fixture unused long enough to see whether drops slow and stop or keep appearing. Note whether the shower was used just before the test. Water remaining in the vertical shower pipe can drain after use. There is no single universal number of “normal” drops; compare the pattern with how this particular fixture behaved before the complaint.
If a dripping bathtub faucet continues to drip, record its rough pace and when you first noticed it. A one-minute count is not a reliable estimate of annual water loss because the rate can change with pressure and control position. If water appears only when the tap is open, look at the handle area, spout connection, and visible joints instead. A leak while filling the tub is not necessarily fixed by the same component as a drip after shutoff.
Look at any deposits or staining without tasting the water. Mineral or corrosion traces can help a technician find a longstanding wet area, but they do not prove which internal part has failed. Likewise, a stained caulk line is not proof that the valve leaks. Bath splashes, shower spray, and another pipe can leave water in a similar place.
Step 3 — Find the visible outlet without opening the wall
For a dripping bathtub faucet, the end of the tub spout is an obvious outlet. If water continues to emerge there with the control closed, the device that stops the flow is a reasonable suspect. Depending on the valve, that device could involve a cartridge, stem, seats and springs, or another model-specific component. Caulking the outside of the spout cannot correct an internal shutoff fault. Use the maker’s parts diagram to choose a component rather than the faucet’s general appearance.
Water at the handle or along the trim plate has a different path. It can travel behind the plate before it becomes visible. Dry and observe the area without removing the trim or enlarging an opening. Stop using the fixture and arrange an inspection if drywall softens, paint swells, or dampness reaches the floor. A professional may need access through an existing service opening or another appropriate point. Covering the symptom with caulk could make the actual leak harder to detect.
If water emerges at the spout base only while the faucet runs, note whether the spout moves or the water comes from the wall connection. Spouts have different attachments, including threaded and set-screw designs. Forcing the wrong type can damage a fitting inside the wall. Record separately any shower flow that appears while the bathtub is filling. Moen describes this kind of shared flow as a possible diverter or installation issue in certain tub and shower systems. That symptom is not automatically a shutoff cartridge failure.
Step 4 — Identify the brand, layout, and model
To identify a dripping bathtub faucet, start with what you already have: an invoice, packaging, warranty record, installation manual, renovation file, or photos from the original work. Look for visible markings on the handle, spout, and trim plate, but do not assume every number is the valve model; it may identify a finish. Photograph the full assembly, each control, the spout, the diverter, and any logo. Note whether there is one handle, two or three handles, a deck-mounted roman tub faucet, or a wall-mounted tub and shower combination.
That layout narrows the search but is rarely enough to order a part. Externally similar products may contain different valves, and manufacturers change internal components between generations. Moen notes that certain deck-mounted roman tub faucets can use a 1248 or 1258 cartridge. Those parts are not interchangeable; the product version needs to be identified. Those part numbers are an example of why identification matters; they are not recommendations for your tub. A manufacturer support team may be able to work from the model information and clear photos.
Say so if you cannot establish the brand or if a renovation may have combined parts from different product lines. A replacement handle does not necessarily identify the valve body hidden in the wall. A plumber may need safe access to identify the valve. Avoid ordering a supposed universal cartridge based solely on the metallic finish, shape of the handle, or number of controls.
Step 5 — Match the symptom to a possible part
For a dripping bathtub faucet with a continuing spout drip when the control is off, look for the model’s “leaking when off” guidance or parts list. In some single-handle designs, a cartridge controls both mixing and shutoff; the manufacturer specifies its part number and removal method. In some two- or three-handle designs, seats and springs or stem assemblies can be involved. Delta describes that troubleshooting sequence for certain of its tub and shower valves. Its RP4993 and RP1740 part numbers should not be assumed to fit another brand or even every Delta model.
For moisture near the handle, a seal, cartridge, retainer, or connection might be involved. Water at the plate does not pinpoint the defective part behind it. A wall leak, spout-base leak, or leak only while water flows may call for an inspection of connections and installation. A diverter that fails to direct flow to the shower is another fault. Sometimes the best parts decision is to inspect before purchasing anything, avoiding repeat openings and unused replacement parts.
Fresh silicone around the wall plate is not a substitute for repairing the pressurized plumbing. Trim and caulking manage surface water and finish the installation, but they do not fix a failed valve or pipe connection. Sealant placed over an active leak can hide the warning while water continues moving behind the wall.
Step 6 — Decide whether the planned repair is workable
Confirm four things before work begins: the exact part is available; the instructions for your model describe the repair; you can safely isolate and restore the supply; and the required access will not leave you working blindly inside a wall. The instructions may also call for protecting the drain from small parts and keeping the components in order. Do not begin just before leaving home or at a time when you cannot leave the water off if a fitting does not go back together.
Stop if a nut will not move, a valve body shifts inside the wall, a screw is damaged, corrosion obscures the parts, or the new component differs from the original and from the diagram. More force can turn a limited repair into a valve replacement. A manufacturer warranty may offer support or have conditions about replacement parts; check before discarding anything. In a multi-unit building, coordinate the supply shutoff and access with the responsible person.
If any of those prerequisites is uncertain, ask for faucet and fixture repair. Describe what you can actually see: photographs, possible brand, number of handles, where water exits, whether it happens with the control on or off, whether a shutoff is available, and any damp building materials. These details help a technician prepare without pretending that a part can always be identified from a picture.
Step 7 — Check the result and keep watch
Follow the product instructions for testing and proceed cautiously. After water is restored, first look at accessible connections and the control area without putting your hands close to a pressurized leak. Run cold and then hot water, operate the diverter if present, and close the tap. Dry the surfaces. After the usual residual water has drained, check whether new drops return at the spout. Look under the spout, around the plate, along the tub edge, and in adjoining spaces where access is safe.
A repair that stops the spout drip while moisture still reaches the wall is incomplete. If the handle’s travel or delivered temperature changed, stop using the bath until the manufacturer’s adjustment and safety requirements are checked. Do not remove a temperature limit to make the water hotter. Record the replacement part number and keep the instructions for future service.
Watch the area through subsequent uses. Returning stains, persistent odour, an unexpected pressure change, or a marked ceiling may point to another escape of water. A dry spout during a short test does not prove that the space behind the bathtub is dry. Arrange an inspection when those signs remain, rather than covering them with finish materials.
Give a plumber a useful description
For a dripping bathtub faucet, use observable details: “drops from the spout after the handle has been off for hours,” “water at the lower edge of the plate only while the shower runs,” or “the spout moves and the wall gets wet when the tub fills.” Say when the issue started and whether it changed suddenly. Count the controls and note whether the spout has a diverter. Include a photo of the full fixture and any markings. A close-up of one droplet alone will not identify the valve.
Explain who can authorize a water shutoff, especially in a condominium or rental. Mention if hot-water temperature has become unpredictable, particularly where children or vulnerable people use the bath. List parts already tried without assuming that a new cartridge rules out another fault. If water touched building materials, describe the affected areas and what you did to limit damage. This information supports an appropriate inspection; it does not guarantee an exact diagnosis before the valve is examined.
Frequently asked questions about a dripping bathtub faucet
My tub spout drips after a shower. Is it necessarily leaking?
No. Water can drain from the shower piping after the control closes. Dry the spout and see whether the drops slow and stop. A continuing drip long after use, especially a new one, deserves diagnosis. Say whether water comes from the tub spout or showerhead.
Can I replace only the bathtub spout?
When the end of the spout drips with the control off, a new spout generally will not correct a failed internal shutoff. If water escapes at the spout’s wall connection while running, inspect that connection and identify the attachment type. Do not remove an unknown spout by force.
How do I choose the right cartridge?
Find the faucet or valve-body model and consult the manufacturer’s exploded parts diagram. Confirm the configuration and product generation. A handle photo alone may be insufficient. Ask the manufacturer or a plumber to help if the valve identity remains unclear.
Why does it still drip after a cartridge change?
The component may be incorrect, installed contrary to its instructions, or the fault may be elsewhere, such as a seat, stem, connection, or valve body. Avoid buying several parts at random. Isolate the water and reassess promptly if it appears near the control or behind the wall.
Will caulking the wall plate stop the leak?
Properly applied caulk can help manage some surface splash, but it cannot repair a leaking valve or pressurized connection. Water that appears from behind the plate needs its source identified before it is concealed.
The shower runs while I fill the tub. Is that the same fault?
It is a different symptom because it occurs while water is flowing. Depending on the fixture, the diverter or installation may be involved. Record whether it is new and whether the diverter moves normally. Our guide to a shower that drips after shutoff concerns water that persists when the tap is closed.
When should I get urgent help?
When water reaches a wall, floor, outlet, ceiling, or another unit; when the shutoff fails; or when the delivered temperature becomes dangerously unpredictable. Stop using the fixture and explain the visible route of the water. A small drip that stays in the tub may allow a planned assessment, but it should not be ignored.
Sources for model checks and safety
- RBQ — shutoff valves in a residential building: isolating supply and coordinating with others.
- Public Health Agency of Canada — water temperature and scalds: hot-water precautions.
- Moen — cartridge identification and replacement: parts vary by model.
- Delta — dripping tub and shower spout: a model-specific troubleshooting example.
- Moen — shared tub and shower flow: distinguishing running-water behaviour from an off-position leak.
Browse Leaks, faucets and fixtures for related guidance. If water continues to escape or reaches the building, describe the observed signs so the right inspection can be planned.