
Leaks, faucets and fixtures
How to descale faucets and showerheads without damaging the finish
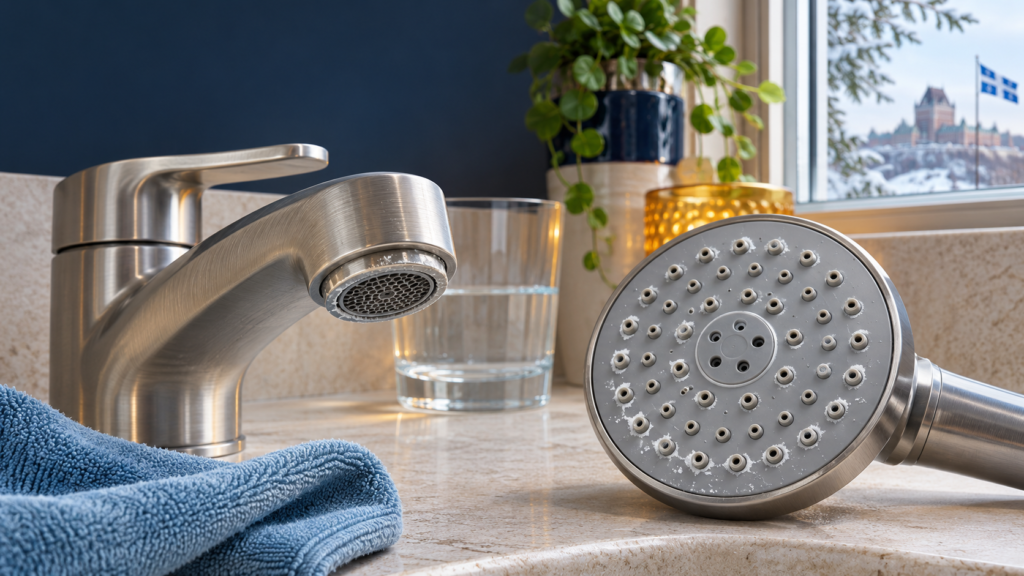
To descale a faucet or showerhead without damaging its finish, begin with lukewarm water and a soft cloth, then check the care instructions for your exact model before using an acidic cleaner. Mineral residue often collects at an aerator or around shower spray nozzles. Cleaning an accessible outlet part may restore a tidy stream without soaking the whole fitting. Diluted vinegar is approved for some products, including certain Delta products under its instructions. It is not a blanket recommendation for every chrome, brushed nickel, matte black, specialty coating, rubber part or nearby stone surface.
Use this guide to tell visible scale from other problems, choose the least aggressive useful step, reassemble small parts carefully and recognize when low flow or a leak needs a different check. Stop if the finish changes colour, a connection moves, water leaks after reassembly, or several fixtures lose flow together.
Is it mineral scale, soap film or a different fault?
A visible mineral deposit often looks like a white or pale grey ring at the end of a spout, around individual spray holes or where droplets regularly dry. As water evaporates, dissolved material can remain on a surface. Hard water can make this more noticeable, but a white mark alone does not measure your water hardness or prove that the pipes inside a home are blocked. Shampoo, soap and cleaning residue can leave a separate film. In a shower, more than one type of residue may be present.
Notice the pattern before applying anything. A stream that fans out sideways at just one sink can point to the aerator, the small outlet assembly in many faucet spouts. A showerhead with a few jets shooting at odd angles may have residue at those nozzles. However, low flow at several taps, a change only on the hot side or a sudden change throughout the home deserves a broader look. An outlet cleaning cannot correct a partly closed supply valve, a restriction upstream or a temporary supply issue. Make observations first, then select the appropriate next step.
Rust-coloured, green or dark marks should not be treated automatically as mineral scale. They might be stains from another source, product residue or evidence of a surface problem. If the coating looks pitted, peeling or discoloured, rubbing harder may expose more of the layer beneath it. Our separate guide to rust stains on bathroom fixtures explains that different cleaning decision. If you do not know what the mark is, begin with plain water and stop if the surface reacts.
Before cleaning: protect the finish, gasket and surrounding surfaces
Find the manufacturer and model number if possible. Packaging, purchase records or a product sheet may identify the exact finish. Care guidance can differ between models from one brand and between finishes that look similar. A cleaning solution approved for a particular polished chrome faucet is not automatically safe for a matte black coating or a painted part. Delta Faucet Canada recommends gentle, non-abrasive wiping and thorough rinsing for its products; it also gives specific conditions for diluted vinegar. American Standard Canada separates its finish advice. Your own product instructions should decide which method comes after plain water.
Gather a clean soft cloth, lukewarm water, a small bowl, a towel and, only where the manufacturer permits it, a soft-bristled brush for a removable part. Avoid steel wool, scouring pads, metal picks, sharp blades and abrasive powders. A clean cloth matters: grit trapped in a reused rag can scratch a coating even when the cleaning solution is mild. Lay a towel in the basin or tub so a small aerator washer cannot fall down the drain. Take a photograph before taking apart an outlet, especially if several screens and rings sit inside it.
Turn off the faucet or shower control while handling parts. Let recently heated fittings cool. Do not test the result by placing a hand straight under a potentially hot stream. The Public Health Agency of Canada warns that hot tap water can scald quickly; check temperature cautiously after reassembly. If an approved cleaner is used, follow its label, ventilate the room as instructed and never combine household products. Protect natural stone, tile grout, wood cabinets and nearby metals from splashes. Compatibility with the faucet finish does not establish compatibility with the countertop or shower surround.
How to clean a faucet and its aerator
Start with the visible exterior
Dampen a soft cloth with lukewarm water and gently wipe the spout, handle and outlet rim. Avoid pouring cleaner directly over the fitting, where it could settle in a seam or under a handle. Use several light passes instead of high pressure. Wipe away residue with a separate damp cloth, then dry the surface promptly with a clean soft towel. This can remove recent water spots and reveals whether the mark is a removable surface deposit or a change in the coating itself.
If the product instructions allow a cleaner, follow the stated concentration, contact time and rinsing method. Delta, for example, describes equal parts white vinegar and water for hard-water spots on its finishes and instructs users to rinse thoroughly afterward. That is a brand-specific instruction, not a universal rule for every faucet. A toilet-bowl cleaner, rust remover or powerful limescale product may strip a finish while removing a white mark. Do not leave any approved solution to dry on the fitting. Also avoid improvising a long soak around an installed faucet with a plastic bag: the liquid can reach joints and surfaces you did not intend to treat.
Check a removable aerator without forcing it
Many spouts have an aerator at the outlet; others use a recessed insert that needs a dedicated key. Consult the model instructions to see whether removal is intended and what tool is suitable. With the control closed and the basin protected, try the prescribed method gently. Bare pliers can mar the spout and deform the ring. If the part will not move, stop before damaging its threads. Photograph the order and orientation of any screens, flow parts and washers. Rinse loose particles into a bowl or under a gentle stream so the small pieces stay together.
For remaining scale, treat only the removable part and only with a method allowed for that part. A permitted soak of a detached aerator is easier to control than a bag of cleaner fastened around the whole spout. It keeps the solution away from the faucet body, countertop and external seals. Do not immerse electronics or a part that the manufacturer says must remain dry. Rinse completely afterward. Reassemble the pieces in their original order and tighten the aerator only as directed; more force does not improve cleaning.
Open the water gradually. Watch whether the stream is even and whether a drop forms around the aerator ring while water runs or after it stops. A small leak may mean a gasket is missing, twisted or damaged. Turn the water off and check the assembly. If you cannot confirm the correct arrangement, have the model identified instead of stacking extra tape or applying greater force. Replacing a generic aerator without checking size and fit can create a new leak or change the intended flow pattern.
If the outlet is hidden or stuck
A recessed aerator, seized ring or fragile outlet is not an invitation to grip the spout harder. Clean only accessible surfaces according to the finish instructions, then find the product manual or correct removal key. A visible deposit does not prove that the internal screen is the sole cause of weak flow. Damaging threads during cleaning can turn a simple maintenance question into a repair. If the jet remains irregular, note the model and ask about its correct outlet part before buying a replacement.
How to descale a showerhead
Soft spray nozzles
Many showerheads have flexible nozzles designed to release visible deposits when wiped or rubbed gently. Follow the manufacturer’s directions for your model. Delta, for example, advises wiping the spray holes on its Touch-Clean models. Close the shower control, allow the head to cool and clean the accessible face with a soft cloth. Work lightly around each affected nozzle rather than pushing a pin into it. A needle can tear an insert or change the opening, making the spray pattern worse. Rinse, run water at a safely checked temperature and see whether the jets return to their usual direction.
Removable head with more persistent deposits
If removal is described in the instructions, support the shower arm or hose connection while unscrewing the head. Do not twist a wall connection that moves with it. A cracked hose, loose wall fitting or water mark around an escutcheon is a reason to stop and seek a repair assessment. Place the removed head on a towel. Clean its face as the manual permits and immerse only the portion the manufacturer says can be soaked. Delta describes a half-white-vinegar, half-water soak for some non Touch-Clean heads, but that direction does not establish safety for another manufacturer’s finish or internal components.
Rinse the head and nozzles thoroughly. Check that the gasket at the connection remains present, clean and properly seated. Reconnect according to the product instructions without straining the arm, overtightening the nut or adding unnecessary tape over a connection that seals with a washer. Open the water gently, observe the spray and inspect the connection both during and after use. A drip from the connection is not harmless leftover scale. For a damaged head or a connection that needs to be redone, our guide to replacing a showerhead without harming the fitting covers the separate replacement decision.
Fixed, filtered or electronic models
A multi-function head, built-in filter, lighting feature or unusual connection may require product-specific care. A bag of vinegar tied around an installed head can soak materials and seals that are not meant to be immersed, while liquid runs over grout, natural stone or a decorative finish. If the manufacturer permits it, wiping the exposed nozzles is the more controlled first step. If access is poor or the manual rules out common cleaners, do not guess at a stronger chemical. Damage to a coating or gasket may occur before the hidden deposit dissolves.
Chrome, brushed nickel and matte black require model-specific care
A finish is the visible protective surface, not merely the metal or plastic beneath it. Two fittings with similar colours can have different coatings. Polished chrome may tolerate a treatment described by its maker but still scratch under an abrasive pad. Brushed nickel has a texture that can show changes from harsh scrubbing. Matte black and decorative finishes may react to cleaners or repeated rubbing. Colour alone cannot tell you what acid concentration or brush is safe.
Plain water, a soft cloth and prompt drying are the conservative common starting point. American Standard Canada recommends this general approach for its faucets and then discusses individual options for polished chrome, polished nickel, brushed nickel and matte black. The differences illustrate why “use vinegar on every faucet” is unsound. If you do not know the manufacturer, keep to gentle wiping until you identify the product. A small trial in a less visible area, where the manufacturer permits one, may show an immediate reaction, but it cannot guarantee that an older worn coating will behave the same everywhere.
Rinse any approved cleaning solution completely and dry the fitting and adjacent surfaces. If a cloudy mark does not lift with gentle care, it may be finish damage rather than remaining mineral scale. More pressure, concentrated acid or polishing compound can enlarge the mark. Stop if the finish becomes rough, fades or reveals a lower layer. Photograph the model and affected area before asking the manufacturer about care, warranty or a replacement part. Cleaning can remove a deposit; it cannot rebuild a failed protective coating.
Common mistakes that turn maintenance into damage
- Soaking the entire fitting without checking its instructions. A detached aerator is different from an installed faucet with seals, controls or electronics.
- Using toilet cleaner, rust remover or an abrasive pad. Removing the mark does not prove the coating survived the process.
- Scrubbing dry. Fine grit in a cloth can scratch a surface; dampen it, rinse it and finish with a clean towel.
- Forcing a ring or shower arm. A damaged thread or hidden wall connection is a larger problem than a stubborn white line.
- Misplacing a washer. Keep parts in order and verify the seal before returning the fixture to regular use.
- Calling every weak stream a pressure problem. A single outlet can be restricted locally; the same symptom at multiple fixtures needs a broader investigation.
If a cleaner has already irritated skin or caused an unusual reaction, follow its label for rinsing and do not add another product. If water reaches an electrical outlet or device, avoid touching it and have the situation made safe. The scope here is accessible surfaces and outlet parts. It does not include taking apart a concealed valve, opening a wall or working on a live water supply system.
When cleaning does not restore flow
After reassembly, compare the flow to what is normal for that fixture. Confirm that the aerator is seated correctly and no connection leaks. Then make a few useful observations: is only one fixture affected or several? Is it hot, cold or both? Is the change steady or intermittent? These details help separate possibilities but do not establish a diagnosis by themselves. If a clean aerator and clear spray face still leave weak flow, repeated stronger soaks are unlikely to be the safest next move.
For symptoms at multiple outlets, investigate the wider supply and pressure picture. If a leak appears at the aerator, beneath the sink or near a shower connection, close an accessible shutoff if you can do so safely and request an assessment. A shower wall connection deserves attention even when the visible drip looks small: water may travel behind the finish. Avoid using that shower until the cause is checked.
A qualified professional can determine whether the outlet part, a worn component or a restriction elsewhere is involved. The suitable repair depends on the fitting and what is actually found, not on the colour of a deposit. For a leak, damaged connection or faucet repair need, see ProDrain’s faucet, sink and shower services. When describing the issue, have the brand, affected fixture, date of the flow change and any visible leak ready. That helps orient a service request without assuming a particular method or price.
Keep deposits manageable without over-cleaning
A quick wipe of accessible surfaces after use can reduce the marks left as droplets dry. That does not mean a chemical treatment is needed after every shower. Rinse soap residue with clear water when practical and dry the finish with a soft cloth. Replace a rag that has picked up abrasive particles. Keep the product care sheet available: it is more useful for this fitting than a general trick written for another brand.
If spots return quickly, look at where water remains. Does it pool around the faucet base, drip from the showerhead after the valve is closed, splash back from the sink, or stay on an area that is difficult to dry? A small change in routine may address external marks. On the other hand, continued dripping after the shower control is closed can involve the valve rather than the showerhead face. Our article on a shower that drips after shutoff explains that separate symptom.
There is no universal soaking schedule for all finishes. Water characteristics, use and the product design vary. Visual checks and gentle cleaning when a spray pattern starts to wander usually offer better decision support than an aggressive preventive treatment. Keep photographs before and after a delicate attempt if you need manufacturer advice. Once a coating is damaged, removing the remaining white residue does not restore its protective layer.
Frequently asked questions
Can I use white vinegar on every faucet?
No. Delta Canada permits a diluted solution for certain marks on its products, while other manufacturers distinguish finishes or advise against acids. Identify the brand, model and care sheet first. Without those details, start with clear water, a soft cloth and thorough drying.
How long should an aerator soak?
Follow the time given by the part or cleaner manufacturer. No single soaking period is safe for every finish, material and gasket. Treating an approved removable part is easier to control than immersing the installed faucet; rinse completely before reassembly.
Must I remove a showerhead to clean it?
Not always. Some soft nozzles are designed for simple wiping. If removal is intended, support the connection and keep the gasket. Do not force a wall arm or a fitting that moves; have a wall-side leak checked.
Does a white deposit mean the pipes are blocked?
No. An external mark and an internal restriction are different observations. An irregular jet at one fixture can justify checking the aerator or nozzles. Reduced flow at several fixtures requires a wider assessment.
What if the finish is already dull or peeling?
Stop testing cleaners. Follow the manufacturer’s gentle care directions and document the area. The coating may need a replacement part or manufacturer advice; more rubbing can enlarge the damage.
When is a plumber useful?
Request an assessment if low flow persists after permitted maintenance, affects several outlets, comes with a leak or involves a loose connection. Share the model and observations so the next checks fit the actual problem.
For related fixture questions, browse Leaks, faucets and fixtures. These steps cover visible maintenance; the instructions for your specific product control how its finish and parts should be cleaned.